How to Integrate Paystack Payment to your Laravel App

Paystack helps businesses in Africa accept payments and it is currently being implemented by thousands of businesses, especially in Nigeria. They have well documented APIs that lets businesses build financial products to serve their customers.
Requirements
To start out, integrating Paystack with Laravel , the following are required:
PHP 5.4+
Composer
Laravel 5.0 & above
Installation
To get the latest version of the laravel-paystack integration , simply require it
composer require unicodeveloper/laravel-paystack
OR in your composer.json file you can add the following to the require block
"unicodeveloper/laravel-paystack": "1.0.*"
Then run composer install or composer update to download it and have the autoloader updated.
After it has been installed , open up config/app.php and add the following to the providers key
'providers' => [
    ...
    Unicodeveloper\Paystack\PaystackServiceProvider::class,
    ...
]
Please note , if you use Laravel >=5.5 you can skip this step and go to the next section.
Also , register the Facade this way:
'aliases' => [
    ...
    'Paystack' => Unicodeveloper\Paystack\Facades\Paystack::class,
    ...
]
Configuration
To publish the configuration file , run this command :
php artisan vendor:publish --provider="Unicodeveloper\Paystack\PaystackServiceProvider"
If you did this , a file named paystack.php will be generated automatically in your config directory, with some defaults as seen below:
<?php

return [

    /**
     * Public Key From Paystack Dashboard
     *
     */
    'publicKey' => getenv('PAYSTACK_PUBLIC_KEY'),

    /**
     * Secret Key From Paystack Dashboard
     *
     */
    'secretKey' => getenv('PAYSTACK_SECRET_KEY'),

    /**
     * Paystack Payment URL
     *
     */
    'paymentUrl' => getenv('PAYSTACK_PAYMENT_URL'),

    /**
     * Optional email address of the merchant
     *
     */
    'merchantEmail' => getenv('MERCHANT_EMAIL'),

];
Implementation
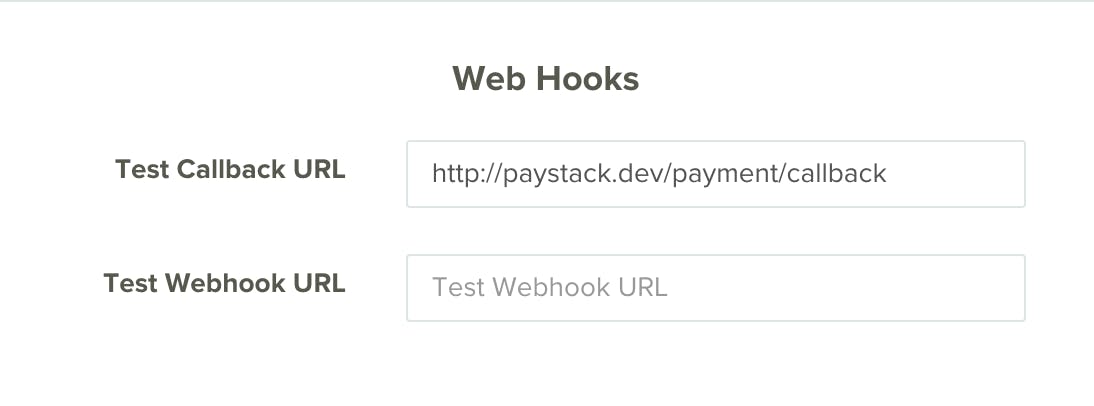
Note: Ensure to have set callback in your Pastack dashboard dashboard.paystack.co/#/settings/developer like so:

To start implementation , there are certain parameters you need to add to your env file , like so:
PAYSTACK_PUBLIC_KEY=xxxxxxxxxxxxx
PAYSTACK_SECRET_KEY=xxxxxxxxxxxxx
PAYSTACK_PAYMENT_URL=https://api.paystack.co
MERCHANT_EMAIL=unicodeveloper@gmail.com
Next, you configure your routes to handle payment request and callback by entering the code below in your web.php file under the routes directory, as follows:
Payment request routes:
// Laravel 5.1.17 and above
Route::post('/pay', 'PaymentController@redirectToGateway')->name('pay');

// Laravel 8 & 9
Route::post('/pay', [App\Http\Controllers\PaymentController::class, 'redirectToGateway'])->name('pay');
Callback routes:
// Laravel 5.0
Route::get('payment/callback', [
    'uses' => 'PaymentController@handleGatewayCallback'
]);

// Laravel 8 & 9
Route::get('/payment/callback', [App\Http\Controllers\PaymentController::class, 'handleGatewayCallback']);
Next , create a controller with the name PaymentController to manage the processes :
<?php

namespace App\Http\Controllers;

use Illuminate\Http\Request;

use App\Http\Requests;
use App\Http\Controllers\Controller;
use Illuminate\Support\Facades\Redirect;
use Paystack;

class PaymentController extends Controller
{

    /**
     * Redirect the User to Paystack Payment Page
     * @return Url
     */
    public function redirectToGateway()
    {
        try{
            return Paystack::getAuthorizationUrl()->redirectNow();
        }catch(\Exception $e) {
            return Redirect::back()->withMessage(['msg'=>'The paystack token has expired. Please refresh the page and try again.', 'type'=>'error']);
        }
    }

    /**
     * Obtain Paystack payment information
     * @return void
     */
    public function handleGatewayCallback()
    {
        $paymentDetails = Paystack::getPaymentData();

        dd($paymentDetails);
        // Now you have the payment details,
        // you can store the authorization_code in your db to allow for recurrent subscriptions
        // you can then redirect or do whatever you want
    }
}
To initialize transaction, there are two methods provided by paystack to go about it, standard and inline. We will explore both methods as follows :
**Standard method**

For the standard method , you can pass data in a function from your controller, as seen in the sample below:

public function makePayment() {

  $data = array(
          "amount" => 700 * 100,
          "reference" => '4g4g5485g8545jg8gj',
          "email" => 'user@mail.com',
          "currency" => "NGN",
          "orderID" => 23456,
      );

  return Paystack::getAuthorizationUrl($data)->redirectNow();

}
OR you make use of an HTML form in the view:
<form method="POST" action="{{ route('pay') }}" role="form">

            <input type="email" name="email" value="test@gmail.com" required> {{-- required --}}
            <input type="text" name="orderID" value="345">
            <input type="text" name="amount" value="800"> {{-- required in kobo --}}
            <input type="text" name="quantity" value="3">
            <input type="text" name="currency" value="NGN">
            <input type="text" name="reference" value="{{ Paystack::genTranxRef() }}"> {{-- required --}}
            {{ csrf_field() }} {{-- works only when using laravel 5.1, 5.2 --}}

            <input type="hidden" name="_token" value="{{ csrf_token() }}"> {{-- employ this in place of csrf_field only in laravel 5.0 --}}

            <p>
                <button class="btn btn-success btn-lg btn-block" type="submit" value="Proceed to Payment">
                    <i class="fa fa-plus-circle fa-lg"></i> Pay Now!
                </button>
            </p>
</form>
Inline method
With the inline method , everything works on a single page. The payment component pops up on the same page.
The customer details can be gotten from your database if you already have it stored, or from a HTML form in the view like in the example below:
    <form id="paymentForm">
    <div class="form-group">
        <label for="email">Email Address</label>
        <input type="email" id="email-address" required />
      </div>
      <div class="form-group">
        <label for="amount">Amount</label>
        <input type="tel" id="amount" required />
      </div>
      <div class="form-group">
        <label for="first-name">First Name</label>
        <input type="text" id="first-name" />
      </div>
      <div class="form-group">
        <label for="last-name">Last Name</label>
        <input type="text" id="last-name" />
      </div>
      <div class="form-submit">
        <button type="submit" onclick="payWithPaystack()"> Pay </button>
      </div>
  </form>
Then include this in the body of the HTML :
<script src="https://js.paystack.co/v1/inline.js"></script>
Next add the payWithPaystack function provided by paystack below your HTML:
   <script>
    const paymentForm = document.getElementById('paymentForm');
paymentForm.addEventListener("submit", payWithPaystack, false);
function payWithPaystack(e) {
  e.preventDefault();

  let handler = PaystackPop.setup({
    key: 'pk_test_xxxxxxxxxx', // Replace with your public key
    email: document.getElementById("email-address").value,
    amount: document.getElementById("amount").value * 100,
    ref: ''+Math.floor((Math.random() * 1000000000) + 1), // generates a pseudo-unique reference. Please replace with a reference you generated. Or remove the line entirely so our API will generate one for you
    // label: "Optional string that replaces customer email"
    onClose: function(){
      alert('Window closed.');
    },
    callback: function(response){
      let message = 'Payment complete! Reference: ' + response.reference;
      alert(message);
    }
  });

  handler.openIframe();
}
  </script>
To handle callback in inline , you can do this in the callback function:
callback: function(response) {
  window.location = "http://www.yoururl.com/verify_transaction.php?reference=" + response.reference;
};
Warning: Paystack warns never to call the Paystack API directly from your frontend to avoid exposing your secret key on the frontend. All requests to the Paystack API should be initiated from your server, and your frontend gets the response from your server.
Conclusion
It's easy and simple to integrate Paystack into a Laravel application. The post explained how to set up the laravel-paystack library and demonstrated how to include it into our application. I really hope this article was very helpful in guiding you through the integration.